Kept being really hard to photograph for some reason, the skin tone just wouldn't show it self - but the final pictures here are quite right colorwise.
Showing posts with label Murder Servitor. Show all posts
Sunday, May 26, 2013
Murder Servitors finished
Done with these killing machines. Quite happy with the way they turned out - mean, unhealthy and ready to rip out some guts.
Kept being really hard to photograph for some reason, the skin tone just wouldn't show it self - but the final pictures here are quite right colorwise.
Tuesday, May 21, 2013
Creeping progress
As hobby time has been scarce over the last week, I've only managed to add a bit of spotcolor/green, paint some cables and touch up a few mistakes made earlier. So it's slowly getting there now.
I have kind of decided against painting either checkers or cogpatterns - doesn't really fit the miniatures I think. Some of the red areas are however quite large, I am counting on the battle damage to take care of that problem though but I might chance opinion on that subject later.
Thursday, May 16, 2013
Red R3-DRUM
Finished off the reds yesterday - doesn't look a grimy and dark anymore, but I like the bright red and find it suiting for the AdMech. It will however change when I add battledamage and weathering, same as the previous ones.
Someone suggested to stay away from white/creamy colors - cog pattern, and I think that is wise. I might add some checkers to the red areas though.
Wednesday, May 15, 2013
New hats for everyone
With the skin done I've touched up a few of the metal areas, and laid down the base of red. Of cause it's very flat, as I've not yet had the time to add any shading or highlights - but it does give a good image of how they will look finished.
I'm still planning on painting the eyes black, but I'm also toying with blue or green with OSL - or even filing the eyes off to make the faces even more expressionless.
Tuesday, May 14, 2013
Cure found?
I think not! Added a couple of highlights and worked some red and purple washed into the skin. Think it works well, looks really unhealthy, maimed, artificial.
Red armour parts will be next.
Still annoyingly difficult to photograph!
Red armour parts will be next.
Still annoyingly difficult to photograph!
Saturday, May 11, 2013
Serious skin disease spottet on LV-426
Rather unhealthy skincolor just as I wanted. Not quite there yet, but I guess one or two more layers will do the trick. The color is quite difficult to photograph under my normal tablelight, but I hope it will show up better once they are taken to the lightbox.
Tuesday, May 7, 2013
Bonefused metal parts
Always a big thing when you actually get the first licks of paint on a model - kind of makes promises for the future, that it will actually be finished.
I was planning on adding both some bronze and some red to the helmet, but I'm not really sure how it will look, or what color to paint the lenses. Guess it's one of those things, you hope will solve it self as it comes along.
Saturday, May 4, 2013
R3-DRUM parts breakdown
On various fora I've been asked about the parts used for the Murder servitors, so I thinks it's time for a full listing. Links to most suppliers can be found in the right sidebar.
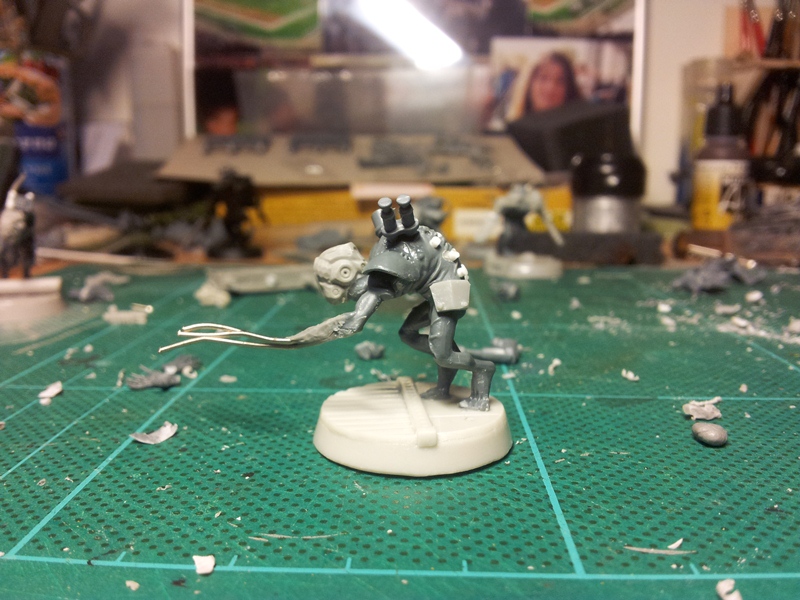
All of them have; GW Ghoul body and legs, Anvilindustry leg guards/armour, head from puppetswar, and various bits of plasticprofiles - the spine-plugs are simply 1mm rod drilled into the back. Cables are either thin guitar-wire, or home-made using Procreate and a tubetool.
Mk 1: GW Cronos pain-engine arm and vial, Necron spine, Kroot shoulderpad, IG optic, Ghoul arm
Mk 2: Anvilindustry bionicarms and chain bayonets.
Mk 3: Ghoul arms with guitar-wire, Kroot shoulderpads, Cronos pain-engine vial and syringe.
Mk 4: GW Cronos pain-engine arms, Necron gun power cell.
Mk 5: Anvilindustry bionicarms and chain bayonets, Necron spine
Friday, May 3, 2013
Tuesday, April 30, 2013
Monday, April 29, 2013
Saturday, April 27, 2013
Friday, April 26, 2013
R3-DRUM
First Murder servitor came out this way. I think it has got a lovingly twisted look to it. I see these as the leftovers from failed experiments in Departemento Biologis, which are as a last service turned into something nasty to release on the enemy.
Servitorclass R3-DRUM Mk 1:
Wednesday, April 24, 2013
Murder Servitors
For quite some time I've wanting to make some murder servitors - twisted bio-engineered constructs, which are pretty much a point and release killing machine - lovely. The basis will be the ghoul model from WHFB - doesn't get more twisted basic structure than that. So here is a few pics of the beginning.
Also per request I present an army so far pic - also know as a Bob-shot.
Subscribe to:
Posts (Atom)